
Spire has a built-in utility to import data, which is important for a multitude of uses, such as updating customer or vendor pricing. Importing must be done very carefully however, since it can also wreak havoc in your Spire data. It is typically done from an Excel spreadsheet.
The Excel Import Spreadsheet
- The spreadsheet must be designed like a database, with a ‘header row’ for each piece of data or ‘field’ to be imported, and the data in rows underneath.
- The spreadsheet must be in the .xls format (or possibily .csv)(not .xlsx) (This may change in the future)
- You must have data in all numeric fields. The fields must have 0 and cannot be blank.
- There can be no blank rows
- Any codes that rely on existing data must exist, such as terms and ship via codes. These are case sensitive – must be in all caps.
- It does not matter what order the rows are in
- There can be extra columns that do not form part of the import
- The import data can be an underlying formula
- To import an account number, such as for the vendor import when you are designating a default vendor GL account, you probably will have to save your spreadsheet as a CSV first.
- For Price Matrix imports, if you are re-importing a price list (where you designate the customer and the part number) you will get duplicate values UNLESS the price matrix record number is part of the import.
- If a field length exceeds the maximum, the import will fail, such as if Address lines exceed 45 characters.
- Correct country codes must be used for country – eg CAN, USA, FRA, GBR, MEX,
- Correct currency codes must be used for currency – eg CAD, USD, EUR, GBP, MXN
- For Chart of Accounts import, you will need to import the division code of 000 even if you are not using divisions
- Boolean fields such as ‘Assign Sales accounts’ are TRUE or FALSE
- For Customer and Vendor imports, ensure that the company variables are set up first for Customers, Vendors and PO’s because otherwise incorrect taxes will probably be defaulted in.
- The Accounts Payable import requires an account; this is not the payables GL account but the default expense account for that vendor. If the GL is not enabled (such as when you are importing A/P for the first and only time), you can choose any expense account.
- For Sales Order imports, if you are importing orders for customers not in Spire, you must designate the sales taxes for the province into which the goods will be shipped (or else it will default to the company sales tax setup)
Below is a sample Excel spreadsheet ready for importing into the Vendor Price table.
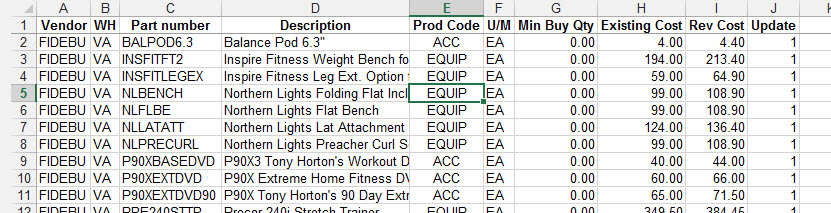
Sample Vendor Price Import Spreadsheet
Setup
As part of the import process, you could use up to three sub-directories to manage your import data. A reasonable plan is to create an ‘Imports’ sub-directory on your server; below that would be three more sub-directories called:
- Source – Where you will save the spreadsheet file that is to be imported
- Destination – Where the file will be moved if the import is successful
- Failure – Where the file will be moved if the import is not successful
Backup your data
It is worth it to take extra precaution, especially if you are new to importing data. It is best to import when no other users require access to the system so that you can do the import and check the data before allowing users back on.
Make a backup of the data using Spire Server to create a ‘snapshot’. (Complete information on creating Snapshots is documented in the article in the FAQ section of the Spire website.)
Steps
In Spire, from the top menu, select Tools => Import
- Select the Source, Destination and Failure sub-directories that you have set up already.
- Set the Date Format if you are importing dates
- Select the Import Type (Customer, Inventory, Vendor Price, etc)
The left side will list all the fields (row headings) of your spreadsheet. The right side will list all the possible import fields
- Click on each spreadsheet field on the left and match it to an import field on the right and click on ‘Match’
You can match the fields in any order, and you do not have to match all spreadsheet fields. You will of course have to match the required fields, which will vary with each type of import.
You can save the settings in a ‘Config’ file by selecting the second icon on the top row of icons. That will allow you to save the project until later or to use the same settings over again.
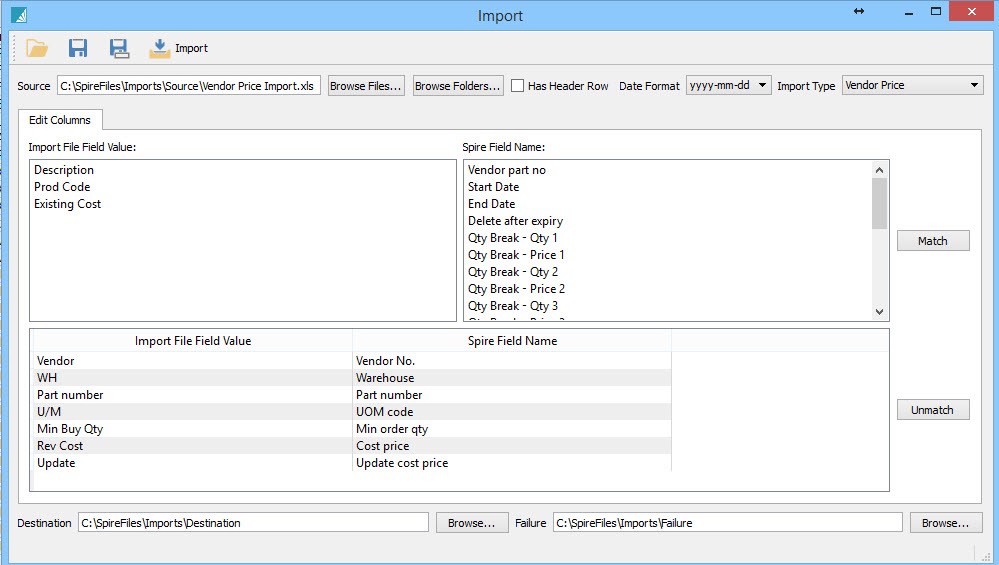
The Spire Import Screen
Very import next step – CLICK the ‘Has Header Row’ box. You will see the data instead of the header row labels.
Check your Import File Field Value against the Spire Field Name one last time. Take a deep breath:) Click on Import button at the top.
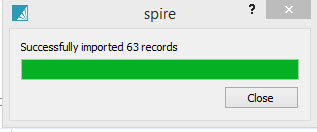
If you were successful, you will get a dialogue indicating how many records were added.
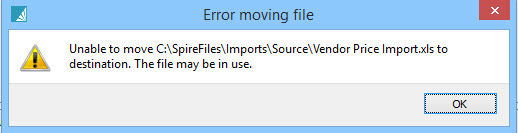
If your only crime was to have your spreadsheet open in Excel while you were importing, you will get the message below, but the import will have been successful. In that case, your spreadsheet will still be in your ‘source’ sub-directory. You might also choose to leave the Excel spreadsheet open on purpose so that Spire does NOT move it.
If your import failed, the dialogue will let you know which row and data element failed to pass validation.
If that is the case, make any required changes in your spreadsheet, save it back into the ‘source’ sub-directory, and try again.
Check your data very carefully before continuing or allowing users back into Spire.
If you realize that you have imported incorrect data and have no way of deleting the new information, you will need to revert to your backup copy of Spire.
